...Trellis...
Last night when I was looking through the Pinterest gardening section I came upon a pin about a twine ball trellis. It looked amazing and decorative but also sounded like it would really work. What you had to do was build a tall frame out of bamboo shoots or wood and wrap twine from the top to the bottom and back until you got to the other side of the frame. Then you put the tip of each bean plant in the loops made out of wrapping the twine and they would, eventually, grow up the twine in fancy little lines. Mike's dad had just advised me that the bean poles were too short so I took a screenshot and saved the directions.
This Afternoon...
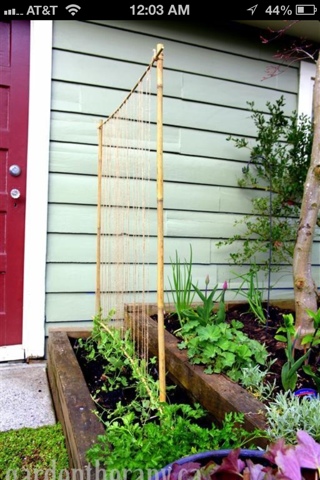
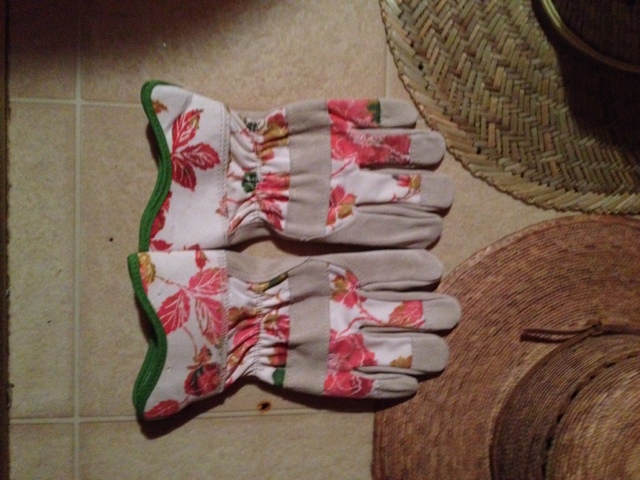
I started building the frame, it was about 5 feet tall and then I leaned the frame against the wall and started wrapping the twine around it. When I got half way done the frame started warping. I held it between my toes on each foot to try to keep it straight and it worked but the second I let go it would lean heavily to one side or the other. Finally, I decided it was because the frame wasn't evenly put together. I started pushing and pulling, trying to get it even but that didn't work. I finally got so frustrated I ripped the whole thing apart and took the twine off. I sat down and started wrapping the twine back into a ball so that I could try again with a shorter frame. I used 4 bamboo shoots and made a new 3 foot frame. I wrapped the twine around and it was good. It leaned a little but not as much as the first. I took it outside, in the constant drizzle, and tried it out. It was too small. I knew it would be so I grabbed one of the worthless tepee trellises and brought that inside. I dried it off and started taking all of the poles off except for the 4 I needed for the frame. I untied each piece of twine and set it aside. As I was working through this I suddenly see an EARWIG. I abhor earwigs. They are so disgusting and they have pincers and they're extremely bad for veggie gardens. I didn't know what to do I didn't have anything on hand to smash it, not even a shoe. So I grabbed the closest book and SLAM. I smashed it. UGH! Then I put plastic kitchen gloves on. I was too scared to touch the trellis without them. I figured it had been hiding in the twine or in one of the holes in the shoot. So I continued and finally was down to 4 poles about 5 feet tall and 3 feet wide. I wrapped the twine, lifted it up, and it didn't lean. I had done it. It looked good too. I took it out and put it in place. It really adds something and I think that the beans will look all that much better when there growing individually up there piece of twine. It'll look decorative and we'll be able to see there progress easily.
Patch...
After that I went to check on Patch. The constant light drizzle has done everything really well and so has my thinning. I didn't realize how important thinning was until today. My radishes are like 3 times the size they were before, the carrots are sprouting real leaves like crazy, and the spinach is an inch taller. The inch doesn't seem like much but believe me it is... they've only grown 5 inches in more than a month so one inch in a few days is major. On a not so nice note the 7 strawberry plants in the 5G bucket don't have any flowers, not one. They are bushy and growing like crazy but they aren't blooming. I don't know if I need to thin them out a bit or if they are just going slower or what but the Topsy Turvy has flowers and the 8G bucket has a strawberry starting and several flowers. The 5G bucket doesn't even have the promise of a flower. All the new growth close to the crown looks like leaf growth, no buds. I hope they bloom soon because I would be disappointed if they just turned out to be greens and nothing more.
Tuesday, April 30, 2013
Monday, April 29, 2013
Beanstalk of an Update
Rain, rain, and more rain...
It has been raining all day. It's just totally soggy outside but I did promise a picture update of everything. I am so happy that today is the today I chose and promised to post because the beans have gone crazy, FINALLY!
Green Arrow beans planted April 6th are now about 3 inches tall. The rain has been really good for everything and especially the beans which have boomed.
Bloomsdale, thinned down to three. Growing 4th set of leaves.
Texas Sweet Onions, planted April 18th, have grown about 6".
Iceberg type lettuce planted April 12ish. Hasn't grown taller but is double the size in bushiness.
Cherry Belle radishes thinned to 3" apart and have grown about an inch since.
Topsy strawberries have gotten bushier and have about 4 flowers so far.
Sweet potatoes, grown about 6 slips in 8 weeks.
First strawberry started, April 28, in the 8G bucket.
Sunday, April 28, 2013
Rain, Rain, Go Away
Come again another day...
When I went outside to finish all of my renovations to Patch it was raining. It wasn't supposed to rain today. It was supposed to be cloudy and rain for the next 3 days. So naturally I was disgruntled and frustrated. I'd spent yesterday working outside and getting things settled or planning on it because I knew it was supposed to rain all week. When that went all wrong I swore that today I would get things into order and then my plants could absorb all the nice rain for the next 3 days and end in a climate revision. Usually the rain brings cold, breaks the heat, but around this time in NOVA it brings the heat. So I was hoping that would happen. I didn't even have to water today because of the rain. All I did was pout and take a look at the Topsy Turvy, raised beds in Patch and Potagar, and brought the greenhouse in out of the rain. Luckily, I headed up and out right when the rain started to hit so it wasn't soaked, water logged.
Green but Slow...
I remember writing about my green but slow thumb and wondering what was causing the plants to slow grow, to the point that they were taking almost double the time. Well I figured it out. It was thinning they needed. They needed it badly. I finally sucked it up and thinned out the radishes (3" apart) and the spinach (down to 3) and the radishes, a much faster crop, has boomed. It looks like they grew an inch overnight. I even thinned the tiny carrot germs. and now they have REAL carrot leaves. Not just the seed leaves. I am so excited. I was being so careful with the thinning just in case plants died that I didn't realize I was stunting their growth. Now all I have to worry about is what I assume are carrot flies. When the carrots popped out so did the flies and thats why I assume thats what they are... I of course can't be sure because all of the pictures online are close-ups so that I can't compare but I think I'll need to invest in some row covers, otherwise, I'll be left with larvae filled carrots and completely disappointed.
I only viewed these things very quickly so I didn't get to take the pictures I promised but I will go out and get them, rain or shine, tomorrow. If your growing carrots and the bed isn't higher than two feet get row covers because the carrot flies will appear, even if you've never seen them in the area in your life and you've lived there for 20+ years. Trust me they don't just bug the carrots. They are all over the place and to be honest I don't know that they haven't already killed most of them and that's why I only have a few of the real leaves in what 3 weeks. I may actually replant if I hit 1/3 of the way to my second rotation and not much has happened. The second carrot rotation should be around mid-June, so if nothing much happens to the carrot plants after I thin, more, and cover them. They are OUT and new ones are going in with immediate covers.
I still need to steady my topsy but it seemed to be out and it was rainy and windy out so I guess I shouldn't have been so upset after all.
Labels:
carrots,
crops,
flies,
greenhouse,
rain,
rotations,
row cover,
Slow,
thinning,
Topsy Turvy
Location:
Arlington, VA, USA
Saturday, April 27, 2013
Wrong Day
Trellis...
So the plan was to finish making the tepee trellis today, which I did, but it didn't quite tepee. I made two straight trellises and the plan was to lean them up against each other like the ones from Home Depot. What I didn't realize was that I probably needed thicker longer bamboo and boxes that were directly across from each other with space in between the two beds. The two beds are slightly off to the side of each other and right up against one another too. So the tepee didn't quite work out. It also looked silly because it wasn't the length of the bed. Anyway, I'll have to think of something new, maybe I'll just use them as is separately. I don't know yet. I do know that they aren't very sturdy and that they just don't look great. I might even take one and put it in place for the peas and use the other as a trellis for the vines that grow randomly in Patch, as a little decor.
Patch Tree...
As you've probably seen in Patch I had a tree that looked pretty dead. It turns out it was and that I needed to rid my little garden of it because the vines were growing up in such a way that they could have invaded my bed. So I got rid of it. That was a grand disappointment. My once cute and symmetrical garden was off. I needed to move the Topsy for two reasons 1) to fill the void and 2) because it was so low the vines were getting close. I tried using my current shepherd hook and moving it around but that didn't help the height so I switched one for another. I took a very tall old shepherds hook from Potagar and put the wind chime that hung on it on mine. It actually looked nicer and I had a taller hook. The rust didn't matter because in the corner by the patio there was a 2 foot tall hook with a candle lantern that I'd moved into Patch and it had rust so it all matched very rustically ... Now all I had to do was get the hook in place and the Turvy on it. That was a big to do. It was so tall I needed a ladder. I tried getting it on the hook by myself but I feared for my life. I was so scared the ladder would topple and that I'd fall head first down the hill that my legs were shaking. On top of the Topsy being so heavy I couldn't really lift it without crushing everything. So I called Mike out. We tried and tried. Finally we got it on but had pulled the hook out some so it was no longer sturdy. I tried sledge hammering it back in but it still isn't sturdy. I was so frustrated I left it. I am just hoping I don't wake up to 15 smashed and mashed strawberry plants because it didn't hold. I also didn't quite deal with the symmetry issue. I got my mom a hibiscus tree (she keeps it here) that I'd forgotten about that I plan to place in the spot of the old tree. I won't plant it there I'll just place it there for looks. Hopefully that'll restore my Patch to its former beauty. It doesn't have the serene feeling anymore. It just feels a bit vacant. I am hoping once I add some tea lights to the lantern and the hibiscus it'll be even better, but as of tonight today was all wrong.
Note: I couldn't take pictures because it was so late when I got done, I was too frustrated, and it was too dark to really display what I'd done. I'll take some tomorrow and add them to the post along with the trellises and images of plant progress all around.
Labels:
bamboo,
dead tree,
ladder,
Strawberry,
symmetry,
Topsy Turvy,
trellises
Location:
Madison Manor Falls Church
Birthday Backdate
Birthday...
Since I didn't do much gardening today except for watering I am going to write a little bit about my birthday because it was a garden birthday and I didn't get to write about.
Considering, that gardening is my thing on April 18th I spent the very warm afternoon planting tomatoes, lemon balm, and basil. I then showered and got ready for dinner with my family and boyfriend. At dinner I spoke of my garden, my hopes for it and then we did presents. My mom gave me a beautiful garden tool set by Threshold and a matching pair of women's gardening gloves. The ones made of canvas and suede, heavy duty. I like them so much but I know I won't do any planting in them for fear of getting them to the point where they are no longer recognizable. I was going to return them because I knew I would not use them because I liked them so much but I thought again and decided to keep them. I looked around online on how to clean them but found very little. I know garden gloves aren't meant to stay beautifully, perfectly, and purely clean but I also believe that they wouldn't make them in canvas and suede in beautiful patterns if they couldn't maintain some of there glory. So how do you clean these types of gloves? Or are they meant just for heavy duty work, like, weeding, wheeling the wheelbarrow and shoveling ?
Boyfriend...
Once dinner and all of that was done Mike and I came home and opened the presents he'd gotten me. He got me 2 sun hat, I requested, a few unrelated items, and a pair of comfortable headphones, the newest out from Apple, and the MOST comfortable amazing headphones/mic I've ever had. I have a hard time using headphones because my ears are sensitive and he knew I'd want to listen to music as I worked in the garden... great gifts all around. He also knew that I'd have trouble wearing an expensive hat out, at first, so he got me one cheap but very cute one and one more expensive one. That way I can easy in to the nicer one.
Imagined...
When I imagined up Patch I also imagined what I would look like in Patch. I would have a sun hat on or around my neck, matching gloves, tools, and knee pad. I'd be wearing old shorts and a tank top and just be very smiley and peaceful. All the stuff I got on my birthday made that image come true. I don't have the caddy yet but I just found a matching one. Overall really good HAUL and birthday!
Tomorrow...
I'll finish building the tepee trellises, weed, and amend. I'll post a video on how to build the trellises and some images of the finished product in place!
Tool set! |
Caddy I'll soon get! |
![]() |
Cheaper (L) and Pricier (R), love them both. I have a neon shirt to match the cheaper one. |
![]() |
Gloves to match my tool set and soon caddy. Love the pattern! |
Thursday, April 25, 2013
Questions and Trellises
No Answers...
So I have been getting all of my "to do's" on Smart Gardener and to be honest they do provide a little drop down of info that explains each title task but sometimes they just give the wrong kind of info... or maybe I just haven't learned enough yet.
Currently one of my "to do's" is to translate the Lemon Balm. Now that seems weird to me because I started it indoors from seeds and yes I did start late so maybe the site is telling me to transplant according to when I was supposed to plan but I'm not sure. What would make it clear is if they said "transplant at 5" tall" or whatever the appropriate height would be. Question Number two... they are telling me to prep the soil for the sweet potatoes and I did start the slips about 2 months ago now but they aren't ready to go and it makes me nervous that I should already be prepping. I think I have time but does the soil really need to be amended with 8" of soil with a lot of time. Couldn't I amend the soil right before planting?
Issue number 3... it is already prepping me to harvest radishes and they aren't even 3 inches tall not really. So what is going on with my growth rate? Should I be worried considering that I planted when I was supposed to, thinned, and germinated on time. Should I be expecting not to harvest at all? This whole site is making me very nervous.
Home Depot...
On another note I was at home depot today and let me say, off topic, all the plants they had out were DEAD. So ugly, I don't know how they could sell them without discounting them highly. On the other hand, for the first time ever, I saw there trellises. I grabbed two of each type and set them up in triangles trying to mimic what I plan on doing between the squash and melon beds. It was very affirming to know that they were easily leaned up against each other to provide support. I took pictures to show Mike's mom because she would have final say on whether they'd want to buy them but when I got home I decided that I could build the same thing, in 2 pieces, out of Bamboo to match the tomato cage/stakes. I'm going to build a 4 foot square trellis that matches the one pictured below. I liked the tapered ones too but I think I'll have more luck with the squared one and I liked it better. I'll definitely post directions on how to mimic it when I do build it. IF it goes badly you'll know that too.
If you don't have the time to build a bamboo trellis the ones at home depot were very reasonably priced. I just want everything to match so I am going to take the extra step and attempt building. Buying may end up happening but we'll see.
AFAC Work Party Debacle
The reason I ended up at Home Depot looking at Trellises is because I went to the library for a garden work party for AFAC, or so I thought, it ended up I got the day wrong. I read the email on Weds. and it said "tomorrow" so obviously I thought that was today. What I didn't realize was that the email had been sent Tuesday. Luckily, when I emailed to ask about the "party" I didn't reply all. The gardens look beautiful and I should have taken pictures during my 30 minutes wait but I forgot. Everything looks amazing! I can't wait to work on it some more.
Trellis I plan on copying in bamboo, 4'.
Another option, I didn't like the color for the garden and it seemed too small.
Loved this but I thought it would be more difficult to recreate and it was less steady leaned up against one another.
Location:
Arlington, VA, USA
Wednesday, April 24, 2013
Video Patch
Video Update 3...
I promised you guys a video update of everything so here it is. How everything from the spinach container, to the radishes, to the melons in the greenhouse are doing! And how long they've been doing it!
Labels:
cantaloupe,
carrots,
cherry belle,
danver126,
faerie garden,
iceberg,
onions,
patch market,
Potagar,
radishes,
red core chantenay,
seascape,
spinach,
strawberries,
tomatoes,
watermelon
Location:
Arlington, VA, USA
Tuesday, April 23, 2013
Slow Thumb
Today was a boring gardening day... I basically just watered and checked on everything. I hate this whole waiting to do stuff part. In a few weeks I know I'll have weeding, fertilizing, and side dressing to do but at the moment all I have to do is water and sometimes the rain takes care of that for me. To be honest, although all of my tests and seedlings have worked out, it seems like I have a slow growing garden.
My radishes are definitely not going to be ready to harvest in "22 days." My spinach is not going to be ready "30 days" after planting for baby spinach. I may have a green thumb but its also the anti growth hormone green thumb. I don't know if that makes sense but when I post my video update with the current length of time everything has been growing you'll see that things are about 2 weeks behind. Not the warm/hot stuff either. That would make sense because it hasn't been very warm, it's been cool, but things like the spinach that are COOL even cold crops are taking forever too.
Didn't do much more than that today. If anyone knows why veggies would take longer to grow than they are supposed to please let me know. An I missing something? Nutrient? Mineral? Water? Too much water? Anything I might have missed in my reading? And in turn ill of course let you all know if I find something.
Location:
Madison Manor Falls Church
Monday, April 22, 2013
Breaking Bad-- TEA?
Compost Tea...
Today, I did a couple side dressing things. I don't know what the difference is between side dressing and just overall care but that's what the label is on Smart Gardener so I am going with it. I don't use the exact side dressings recommended on Smart Gardener because I've done an enormous amount of reading on gardening and growing veggies so I wanted to try a few different things. I started with the compost tea, which was a recommendation, but I didn't do all the crazy stuff they list online like using a bubbler, strainer and extractor. To be honest it reminds me a little to much of Breaking Bad I didn't want to make the equivalent of Blue Sky compost tea. All I wanted to due was add some of the nutrients from compost into my already planted but not composted crops, like my spinach. Smart Gardener suggested that I side dress with compost tea every 3 weeks after the plants are 4 inches tall. Because my plants are supposed to be harvest-able in like 30 days and there not even close, I decided to add compost tea at 3 inches. See I planted the spinach in the MG garden soil, no perlite. I think it definitely lacks something. So I went about brewing tea. I made a little sache garni with some old cloth, compost in the middle, folded up the ends, and rip tied. I put it in a 14 oz. disposable plastic (heat resistant) cup and poured boiling water over it. I let the "tea" steep for 4 hours as it cooled outdoors and then poured half of the mixture over the soil in my spinach container. I was very careful not to get it on the edible leaves. I only poured half of the mixture because the container didn't need 14 ounces of water. It is probably better to make it a couple days before you need it and water very infrequently before pouring it over so that the most nutrients are absorbed. Anyway, I poured the remaining half into 5G strawberry bucket because it is a "Heavy" fertilizer need plant.
Although, I used the steeped version of compost tea I made an even simpler version. I put a tablespoon of compost in a plastic cup, opened the tap over it, filled, and mixed with a kabob stick until most of the compost had broken down. The mixture was much darker had very little to b strained and only seemed to get darker and darker as it sat. I let that mixture sit for a few hours as well although I'm sure I could have poured it in almost right away. I really only used the steeped version because I'd put more work into it. The chocolate milk version really seemed richer and was much easier. The point of compost tea is to add nutrients that the plants roots can absorb like water. Very simple. You don't need a double bubble, strainer, tubes, Bunsen burners and all that crap. Just water and compost or water cloth/paper towel string/tie and compost. Whichever you like more.
Epsom Spray....
Like I said I didn't follow all of the suggestions on Smart Gardener to a T. I'd read a lot about the use of Epsom salt and the great affect it has on plants. Epsom salt, not actually being salt but magnesium sulfate, adds nutrients to the plants leaves that produce a bushier, bigger, and sweeter crop. So I mixed one tsp. of Epsom salt into a plant spray bottle shook and went a-sprayin'. I sprayed all of my strawberry plants, the onion plants, the spinach, and the lettuce. All of them were said to benefit. I didn't spray the tomatoes because I put a tablespoon of Epsom salt in the hole when I planted them. I won't spray them for another 3 weeks and I'll let you know if it has a negative or seemly positive affect on the plants I did spray. I left my tests in the greenhouse un-sprayed to compare and contrast the results.
Strawberry rocks...
When I went outside to spray I noticed there were a lot of birds about. All of which I suspiciously suspected of wanted to peck at my plants. Because I am so overly protective of the strawberries as you know I ran inside, grabbed my painted rocks, and placed them about. I don't think they are going to work as I've strewn them about just because it doesn't look like they are hanging off the plants. I don't know that the birds are that smart but I rather be safe than sorry so tomorrow Ill glue them to the containers so that they appear to be hanging off the side. CRAZY PLANT LADY - ONE!
![]() |
Compost Tea- sache garni (Left) and chocolate milk type mix (Right). |
Labels:
birds,
bucket,
compost tea,
epsom salt,
magnesium sulfate,
painted rocks,
seascape,
spinach,
spray,
steep,
strawberries,
tea
Location:
Arlington, VA, USA
Sunday, April 21, 2013
Seedling and Test Updates
Update...
Sorry, I've been sick since my birthday so I haven't been able to catch you guys up on the goings on of Patch or Potagar Schoultz. So I decided to do a real test update as my first entry back. The last time I wrote I talked about the weird occurrence in the green bean and spinach patches. Nothing has happened like that since. I have since planted the tomatoes, basil, and lemon balm. A few of my tests and crops have come to life too.
Mesclun Mix: Planted on April 16 and germinated April 17. Half of the seeds were soaked and half came straight from the packet. The primed half germinated after 15 hours and the control group after about 36 hours. They'll need a lot of thinning but have been growing healthfully since planting. The roots appeared mid-prime. I planted the primed seeds just by making sure the roots were finally covered with compost.
Planted April 9 and now about 4 inches tall and ready to transplant when the weather cooperates. This pot had 4 primed seeds only one germinated but it is the tallest and best looking so far.
Primed lemon balm seeds planted on April 9 and germinated about 6 days later. Now we know they made it into the cup.
Planted, uprooted, and replanted from April 16-17. The uprooting has not slowed there germination and priming the seeds has sped it by a few days since they have started to sprout as of today April 21.
Control and scarified watermelon seeds planted on April 9 have started to germinate 12 days later. Scarifying the seed seems to have made no difference in time and they took longer than the primed seeds to sprout. Although they did not move out of place like the first bunch. Priming may make seeds a bit lighter.
Seascapes have doubled in size in the last 10 days and are starting to show signs of blossoms.
Wednesday, April 17, 2013
Pest Pits
Mystery Demolition...
This morning when I got up and went outside to look at what I had planted, yesterday I was shocked. The green beans had been torn out of there spot and there was an enormous hole in the middle of the spinach row. I checked the Mesclun, lettuce, onions, and all of Patch. They were completely fine. That seemed extremely strange to me because two plots of Mesclun seeds that had partly germinated, which is amazing in 1 day, were left untouched as well as actual lettuce and onion bulbs. All of the stuff that seemed more "edible" was untouched. I still can't figure out if a rat or bunny dug up the seeds to be little sucks or the rain we got last night was too hard.
I replanted what was left of the green bean seeds. Pulled out the mutilated newspaper strips and left the rest as is because I was just so shocked. My radish and carrot seeds weren't destroyed. I think it may have something to do with the compost not the seeds but if that was the case the lettuce and onions should have been destroyed as well or maybe not because they are large.
I watered the seeds with 3.99 parts water to .01 parts Epsom salt to give them a boost after there trauma. I watered everything in Patch, the greenhouse and the Topsy Turvy then went inside for the day. The shock of finding Potagar Schoultz mutilated was just to much. I needed a break from the garden to ponder the cause. It is just so strange considering that I've had no trouble with Patch so far... Why would the first Potagar box be so damaged overnight when Patch has been planted for almost 2 weeks. It just seems weird and confusing. We have to put the fence up and the lights out as soon as possible. If it was the rain and it just washed the seeds out well okay but why wasn't the Mesclun washed out?
This is going to haunt me until I find out what destroy such a beautifully planted bed.
I didn't take pictures but I will before i fix the spinach and I'll post them with tomorrow's entry. Weird, shock, weirder.
Garden pests are the pits!
![]() |
Before Pest Pits Weird Occurrence (After Coming Soon.) |
Labels:
germinated,
hole,
mesclun,
onions,
patch,
seeds,
Torn,
weird occurrence
Location:
Madison Manor Falls Church
Tuesday, April 16, 2013
Installing the Plants
Installing the plants....
I planted the lettuce, mesclun mix, spinach, and green beans because they are all cool/warm crops. I'll plant the rest in 2 weeks when we get into warm/hot weather. I built 1 more stake. I am so tired of writing because I happen to be writing a 12 page paper for school so I am going to leave it at that for the day and post pictures. I'll write much more tomorrow and update on video to make up for today's lacking post.
Labels:
green beans,
lettuce,
Mesclun mix,
onions,
spinach
Location:
Madison Manor Falls Church
Monday, April 15, 2013
Diggin' for Gold
Filling the Beds...
I spent most of today outside in the chilly clouded weather finishing the filling of the beds. I had to fill the wheelbarrow, add Perlite, mix the Perlite, wheel to bed, and pour. Digging into the pile and filling the wheelbarrow was one of the hardest parts but unlike I expected it was not the hardest part. I think the hardest part was pouring the compost/perlite mix into the actual beds. The beds were not anchored to the ground so tipping the enormous industrial size wheelbarrow over the edge would cause the bed to move and most of the compost mix would remain inside. I'd then have to rake the mix out, shake the barrow, and/or push it all the way over so that it was upside down over the bed. I had to do this all without shoving the bed over too much because once the beds were a certain amount full they could not be straightened out properly. Let me tell you, beds arranged the way that our beds are arranged do not look very good when they are crooked. The most visually appeasing part of laying them out as we did is the lines, straight lines across the space. Anyway, I had to do this about 5 or 6 times. It took me awhile. After I'd had filled all the beds I filled the wheel barrow one more time and spread the contents between all the beds just to make sure they were properly topped off. Then, I raked them all out making sure that the compost was level and the corners were filled in, it was hardest getting the corners filled because I tried doing so without tossing any compost mix out of the bed.
Tomato Tepees...
After I filled the beds I worked on the tomato cages made of bamboo, done tepee style. What I did to make them was take 3 bamboo sticks make all of the ends level on one end and wrapped a rubber band around them. Then I'd spread the tepee out and take one more bamboo stick and break it into 3 pieces attaching them to the 3 sides of the tepee with 1 rubber band for each end of the broken piece. This made a tier for the tomatoes to rest on. That way we won't have to tie the stems to the tepee. The tomato will find its own way up the tepee-stake and rest its stems on the ledges. I made 3 more before running out of bamboo. We'll need one more pack to make 2 more tepees, one for the green beans, and a trellis for the squash. I'm not exactly sure how I'm going to make the trellis but I have a couple ideas. I also saw some very cool easy ones on Pinterest that I may want to copy. When I was done I placed all 5 of the completed structures outside in the beds they'd be living in this spring and summer. I wanted to make sure that the sizes were adequate. They looked good, if you asked me. I went back inside to work on seed tape directly after finishing the tepees.
Bean Tape...
My last garden task for the day was to make seed tape for the green beans. We have very few items planned for the garden that are cool/warm weather crops but the ones that we do have are a little late. We need to plant them as soon as possible. So I wanted to make sure that the one that the one crop that needs the longest cool/warm weather was ready for tomorrow before I completed my "gardening" day. I cut 12" strips of newspaper and mix flour and water to make a paste. I used a ruler to mark every 3 inches with a pen and put down a drop of flour paste on each mark then dropped a bean in the paste. It went much quicker and was much easier then the carrot, radish, and spinach tape because the beans are so much bigger. I was done in a few minutes and left them to dry. Before I cleaned everything up I went upstairs to strain the other seeds that were soaking. I wanted them to dry out a bit for tomorrow when I make their seed tape. When I strained the Mesclun mix I noticed that many of the seeds had pre-germinated a bit during there soaking. So I left them in a little water and will just broadcast them on there plot. I put the spinach seeds and mesclun mix in separate zip lock bags and finally finished everything I'd set out to do for Potagar Schoultz today.
Once I plant the cool/warm weather plants I'll be focusing my attention on Patch Market and the tests I've been waiting to get results from... some have produced results that I just haven't had the time to tell you about but don't worry I'll report everything later in the week. I should be done with the Potagar for a little bit, anyway, after tomorrow.
FYI- Tomorrow is officially our Last Frost Date, April 16 2013!
![]() |
Potagar Schoultz with filled boxes and tepees in place. |
Location:
Madison Manor Falls Church
Sunday, April 14, 2013
Madness Depot
Home Depot...
Today, I didn't do that much garden work period. The bulk of what I did was for Potagar Schoultz. I watered everything that needed watering in Patch Market. At around one this afternoon Mr. S. and I went to Home Depot to get the plants we needed for the garden. We got there and it was madness. There were tons of people buying up all the plants. Most of the vegetables were gone and it was hard to maneuver our way through the garden center. We ended up getting a lot of what we needed by luck. We found vegetables and fruits people and picked up and put back down in different places. Luckily, we were able to do self check-out because everything we were getting was small and had a bar code. Mr. S. pushed the cart ahead to self check out while I got 2 more bags of Perlite. I tried to catch up with him but this horrendous old lady thought I was trying to cut in front of her on the way to the line and kept blocking me off. Finally, I was able to step in front of her and she tried to smash into me on my way passed with her cart. Sunday is a horrible day to go to Home Depot but we got cantaloupe, lemon balm, summer squash, spinach, mesclun mix, zucchini, and a few others I can't remember. Mike's dad picked up some tomato cages because he couldn't find bamboo and of course the Perlite.
Once we got home and unloaded I went to Ayers (the local hardware store) to pick up a few more plants. I got there and could immediately see that things were pretty sparse there too. Even though things were sparse I got a tomatoberry plant, patty pan squash, Chili peppers, and cucumbers in the plant section. I ended up grabbing a packet of bamboo for the trellis and a plant spray bottle. When I got home I unloaded and let Mr. S. know what I'd picked up. I told him that we should return all 6 of the cages he'd bought at Home Depot and use the bamboo. The bamboo was $4 a pack and each cage was $8.00. The savings is worth the return trip.
Later...
I planted the remaining strawberry plants in another container and put them in Patch and built two tomato stakes out of bamboo and rubber bands. I entered the plants we'd gotten into Smart Gardener and made the actual final plan and noticed that the lemon balm seeds I'd planted had germinated. It took them eleven days. I guess I was able to get some seeds in and they germinated faster because they were soaked. Even though they were hard to handle and I wasn't completely sure I had gotten the seeds into the cups it was worth it.
Tiny Lemon Balm seedling. (top right)
DIY bamboo stakes for the peas and tomatoes.
Seascape strawberry container.
Labels:
bamboo,
Home Depot,
lemon balm,
patch market,
Potagar,
seedlings,
stakes,
strawberries,
trellis
Location:
Madison Manor Falls Church
Saturday, April 13, 2013
Potagar Schoultz
Patch Update...
Today I didn't work on my garden except for watering and setting out the greenhouse. I noticed that the first carrot seeds started to germinate, there are only 2, so far, but I still have a few days. I hope they'll all come out but if they don't I'll have the time to replant. I didn't work on my garden but I did work on the Potagar.
Setting Up...
It was a beautiful warm Saturday with a nice breeze, Mr. S. was home and working on his garden. I woke up early but didn't get up until about noon. I stayed in bed watching Big Love. When I finally made my way up and out I saw that he'd built 4 out of the 5 beds. He had them laid out just as they were built and I asked "is this how you plan on setting them up?" He said "No I just built them and put them down. I still have one more to build. I think we might put one next to your bed [in Patch]." I thought about how I'd set up the raised beds in the measured space on Smart Gardener and about how I could have gotten the measurements so wrong. It didn't seem like all the four by four beds would fit around the four by eight bed. Next thing I knew I had the measuring tape out, had grabbed a built 4x4, and started moving it . Nobody was out back at this point so I thought I could easily try a few different positions out...
So I started rearranging and it turned out that I hadn't measured "so" incorrectly. I was a little off but not as off as it seemed. I moved the large bed into the middle and put 2 small beds on the left and 2 on the right (one was just the box of the bed that had yet to be put together). I thought it looked good but needed to get approval. I asked Mr. S to come take a look, he liked it but said I had to get Mrs. S to approve. One the conditions of Potagar Schoultz was that it made the yard look beautiful. He asked her to take a look and she liked it but thought that the yet-to-be-built bed should be left that way. Once I explained that it wouldn't take more of the space to the right she was in, I think she loved it! So I started putting together the last bed and set it in its spot. It looked good, GREAT!
Next Step...
The next step was to lay out the newspaper to kill the grass and weeds. Mr. S asked me to do that while he went out for a few minutes. I said that I would and went inside to grab a bunch of paper. I laid it all out and then realized that, that nice breeze was blowing it all up. I laid bricks, a rake, a hoe, and extra bundled up paper in the middle of each bed to hold it down. After I finished all of that I realized that those items wouldn't hold each and every end. I thought of how I could keep everything down while we added soil to each bed. I knew that we weren't going to do it right away and that when we did, it would take us some time. So, I watered the paper. Damping it did hold it down but I got soaked from the mid-thigh down. The hose isn't spraying properly anymore. I moved on to moving everything out of the way of the cement walk. We needed it cleared to roll the wheelbarrow back and forth. I finally grabbed the wheelbarrow, rolled over to the compost heap, and started filling it. I got it about half way full when Mr. S got back with lunch. I stopped cleaned up the remaining paper and went in to wash up for lunch. I was a hot mess from shoveling compost. It was the part I knew would be the most trying...
After Lunch...
I took an hour break for lunch and to watch a little more Big Love. At around 3pm I went back outside. Mike's Dad was out there filling up the barrow for the 3rd time. He had almost filled one full 4x4. I helped him fill the wheelbarrow, add Perlite, fill more, add more Perlite, mix, wheel, drop in beds, and rake out what didn't drop. We did this 7 times. We filled two beds to the top and just added enough compost to the other beds to hold the newspaper in place overnight. The paper had dried by then. After that Mr. S went inside and I cleaned up the empty boxes, bags, and moved the wheelbarrow back to the heap for tomorrow. I was exhausted. I went in to shower, have dinner, and relax.
Later that day...
I took the print out from SmartGarden and started writing down the number of each plant we still needed and whether we needed seeds or seedlings. As I did that I realize that we had a large amount of certain plants to buy and they happen to be the ones that weren't favorites. For example, it was listed that we needed 16 sweet basil plants. I changed a couple things around so that 1 bed is dedicated to cantaloupe and the other to watermelon. I removed a few of the tomato and basil plants and added a few of the varieties with low yields We're completely set for 1 more Home Depot trip if they have sweet potatoes if they don't we'll have to make one for trip for that. Once we buy everything and add the rest of the compost we'll be ready to plant each and every single seedling and seed minus the sweet potato, peppers, and watermelons. Those will be left inside until it heats up a little more. They like warm and long hot days. We're still in the "cool" time frame. It's going to look amazing with most of the things planted and even more amazing with everything planted!
Full View of all 5 beds from driveway gate.
Large 4 x 8ft. bed and left side 4 x 4ft. top corner bed.
Final Potagar Schoultz lay out.
Labels:
compost,
Greenes Fence,
hose kinks,
newspaper,
plants,
Potagar,
raised beds,
wheelbarrow
Location:
Madison Manor Falls Church
Friday, April 12, 2013
Sugar Baby!
Watermelon...
Today was not much of a gardening day for me. It rained this morning so the outdoor bed in Patch, the Topsy Turvy, the spinach and the 5G strawberries was watered sufficiently. By the time the rain had stopped the heat had broken. It did warm up quite a bit from last night's chill but it wasn't even close to the 90's. The cooler weather isn't meant to last which is okay with me because the watermelon seedlings like the heat. The rest of my plants can tolerate the kind of heat we're looking towards; high 70's and low 80's. As I was putting out the greenhouses and checking on things I noticed that there were 4 watermelon plants. Three in one neat row and 1 in another newspaper pot. It was interesting to me that they sprouted where they did. They sprouted in 1 row to the far left of the pot.I'd originally planted 4 seeds in each corner but my guess is that the first watering washed them around. I take care to water gently when planting and otherwise so that I don't over-water but it seems that didn't matter much in this case. Like I mentioned before, the watermelon seeds actually germinating were my "reach." I told my mom this and she said that, that was weird because "in Honduras people spit [the seeds] out all over the backjard and they grow, with a lot of melons." I replied saying that was probably due to the heat and of course her reply was "well I used to see them growing all over the mountains where it was cooler and they were so big the men had to carry them on the shoulder." I'm still excited though and feel like the seeds germinating proves my green thumb but disappointed about the fact that they've germinated lined up in one tight row because that means that I won't be able to separate them to give the extra's away. I'll have to transplant all 3 and thin the weakest. The 4th germinating seed, in a separate pot, unluckily isn't looking very strong, which makes sense, I planted four seeds in that pot and only one has shown its little face or large face, if you're thinking comparatively. I forgot to check if one pot was primed and the other wasn't if so I'll let you know the results in tomorrows blog.
Topsy Turvy...
Everything else seems to be doing really great except for the Topsy Turvy. One plant died and the other I was able to revive but the ones that are in there and not dead aren't looking too good. I feel like all the roots were dragged down out of position when I added the layers of soil and watered. I am so happy that I got extra's. I knew that the strawberry was the one thing I wanted results from because they're my favorite fruit and because of last years death. So the extras were a must and I am so glad I did buy them. If the Topsy Turvy doesn't end up working out (predicting that will be the case) I'll get at least (hopefully) 5 pints from the 5G bucket and 2 from the other container I plan to fill with the remaining plants. That should be enough to satisfy me, this year anyway.
Home Depot...
Hours after tending to my gardening at home I made a trip to Home Depot for Mike's dad. He wanted to get the other 4 raised beds that he needs for his garden, Potagar Schoultz. I offered to do it so I did. I went to Home Depot asked someone where they were and once directed headed out to the Garden Center to get them. I thought they would be much heavier so as I looked for the right size I was plotting how I would get them on my cart and into the car. They turned out to be extremely light. So light I was able to carry two at a time up the hilled driveway when I got home but we're not there yet. I found the right size in 2 places and picked the spot where they were on the ground to choose from. I picked one and noticed that the grooves weren't cut out all the way so I put that one back and carefully looked through each one, picking the 4 best I saw. Once I had them on my cart I went over to the vegetable plants just to have a look. It turns out that Home Depot has recently switched from cool weather to warm weather veggies. The last trip they didn't have squash, cucumbers, zucchini, or cantaloupe. This time they had all of that and a million tomato varieties. I wanted so badly to pick up a squash or zucchini plant and maybe even a melon plant but I resisted. I knew that I didn't have space in my garden and Mr. S didn't say I could pick up anything for there garden. After taking a look at everything and really just admiring the plants I headed inside to take a look at the seeds. I figured if I couldn't grow any of those seedlings because I don't have the space I could at least test growing them from seeds. I've had such a great time testing everything. So I picked up a packet of zucchini seeds and kept looking. I realized that zucchini needed 36" so I put them back and grabbed a packet of crookneck summer squash (only needs 18') I figured maybe I could find a space for one 18 inch plant if it did germinate. I just couldn't resist. So I grabbed the packet and forced myself to leave because if I'd stayed I would have ended up picking out 7 more seed packets to "test."
I headed over to the indoor garden space at the front of the store where they keep the Perlite. I know, I know I said that if the Bulk-man said that Mr. S. didn't need to add Perlite then he shouldn't waste the money. The thing is I tested some of the compost and it didn't have a drainage problem, not at all, but I could see it happening. So if Perlite can only help and not hurt then I figured it was better to be safe and add/buy the Perlite. For all of that compost he would only need 5 bags at $4.00/bag. I think the $20 is well spent considering that the beds were like $300.00 and the compost was $118.00. Why potentially waste all that money plus all the money on the 72 individual plants needed to fill Potagar Schoultz when $20 on Perlite could eliminate any potential problem with drainage. Plus, I think the Perlite makes the compost look more aesthetically pleasing, again worth it for $20. You put all this work and money into making something produce well and look nice so why not?
I paid loaded the car and got everything into the backyard, or like my mom would say the backjjjard, all on my own. I was happy to do it and happy to be given the task. I've been getting so used to having a lot to do outside that today would have been a little dull without it.
Bush Sugar Baby, planted in 4 corners, germinated at 7 days in a row.
Single Bush Baby in 2nd pot.
Revived strawberry plant from near death in Topsy.
March 29 - April 10, 2013
Seascape, died in root dragging dry-out during Topsy transfer.
Greenes Fence cedar raised beds, 4ft. x 4ft. x 7in.
Labels:
bucket,
bush sugar baby,
compost,
container,
Greenes Fence,
Home Depot,
Perlite,
rain,
raised beds,
Topsy Turvy,
watermelon
Location:
Madison Manor Falls Church
Thursday, April 11, 2013
Outdoor Patch & Vid2
Planting more...
This morning and afternoon I worked in the scorching weather planting more watermelon seeds, almost all of the rest of the strawberries, watering, and planting another round of Lemon Balm.
I planted a few more watermelon seeds in the hopes that they would germinate like a few of the others have and I'd be able to give them to AFAC. I didn't plant them all in the beginning because they were my "reach" plant. If they did germinate then I'd planned to grow more. Not all of them have, yet, but I do hope they will. I planted the new pots with compost, perlite, and organic potting mix. I think the compost will give the watermelon seeds the kick they need. I also planted the seeds that were in the bottle. They weren't doing anything at all so I guess those are our results. You cannot pre-germinate scarified or any watermelon seeds. I am hoping the ones in the bottle will germinate in soil so we'll have some data on whether or not scarifying helps any.
I planted some more Lemon Balm because I'd forgotten to plant a control group. The cups I did plant of Lemon Balm were with primed seeds that actually turned out very difficult to plant. I still don't know that I got any of them in the pots. I have a few more days until the proposed germination time is up so I guess we'll find out soon. In the mean time, I wanted to make sure I had both primed and controlled groups trying to germinate. Lemon Balm is really amazing in deterring pests, it smells great, and is used for medicinal purposes. It would be nice to have some around.
I replaced 2 of the strawberry plants (from the top 2 ports) in the Topsy Turvy. One had completely died because the roots weren't covered and one was almost dead. I was able to revive the second by removing it from the TT planter and planting it back in a cup with mostly compost. It has perked up a lot since. I added two new plants to the TT and more compost and soil to make sure that the roots were fully covered and watering wouldn't wash them out. So far Topsy Turvy is getting a thumbs down. Because I can't rely on the TT planter, and I have extra strawberry plants, I planted the 5-gallon bucket I painted with 7 strawberry plants. I poked holes in the bottom of the bucket with nails and a hammer and planted along the rim so that the plants would hang over the edge when they got tall enough. That way I don't have to worry about rotting fruit. I'm hoping one of the two planters or both gives me a good harvest. In case your wondering, I'm able to plant that many plants in a small container because 1) I don't plan to let the runners grow and 2) the plants don't need as much space when they've got a "wall" on one side.
After I planted and watered the 5-gallon bucket I carried it over to Patch and set it down while I grabbed 3 bricks to lay under the bucket. The bricks have 2 holes in them and will help with drainage for the planter. This will be a test of which works best... more traditional planter or Topsy Turvy Upside Down planter?
Thinning seeds after step 2 and tour of Patch Outdoors.
Making the planter hammering nails in to make holes.
Planter completed and set on bricks to help with drainage.
Wednesday, April 10, 2013
Heated
Morning...
When I got up I ran straight upstairs to take the tops of the greenhouses because I'd left them outside overnight. The air conditioning has been on in the house since the weather's hit the 80's and 90's. I thought the warm night air would be better for them then the cool fake air. I probably should have made a point to get up earlier because when I got out there it was already sweltering. The tops weren't 100% on because I didn't pin them down, hoping the wind would pull them up if needed. I took the lids off and checked on everything watering as I went along. When I got to the topsy turvy I noticed it was still draining from the day before but that the top was dry so I added just a little water to the top and moved it to a sunnier spot, on that would heat the whole planter evenly.
Then I went to go check on the raised bed in Patch. I noticed it was dry and nothing else until I came back with the watering can. The radishes had germinated, 4 days exactly, but only in the bottom row. So I watered and hoped that the others would germinate by tomorrow. I basically ran back inside after that because I was burning up.
I took a shower changed into a cool light weight dress and went back outside to take a picture of the raised bed. On my way out I called the Bulk-man about the compost. I had gotten up early awaiting his delivery but he hadn't called. I wanted to make sure I'd gotten it right... he answered and said that I had but that they were running late and would be here to deliver the compost in the afternoon. I said ok and hung up as I reached Patch. I looked down and noticed that in the few hours I'd been inside the other plot of radishes germinated. I was so excited and still am. I had mixed feelings about my bed because I'd used garden soil instead of potting mix. I'd amended the mistake myself and haven't been that confident about it until I saw the other radishes. Once I saw those I decided it was warm enough and would get cool enough to plant my heads of lettuce. I grabbed the bag of compost a shovel and all four cups with my lettuce seedlings in them. I dug into the top two plots of the raised bed and amended the soil even further with compost then I picked the best looking two of the four and plants them. Unlike the strawberries the roots had spread throughout the soil I'd added in the cups and really looked strong and healthy. After planting I watered and went back inside.
I went back out around 6:30pm to check on everything and noticed that even though the lettuce had been in the sun all day it was nice and crisp not wilted. The hot sun wilted it in the cups to extremes. I am happy I chose to plant them today and believe that they'll give me a continuous harvest all the way through the fall.
Later that evening...
At around 7pm when I was just sitting down to dinner I texted the Bulk-man and asked if he was going to make it. He texted back saying that he had just loaded the truck and would be here within the hour. I asked if he'd rather come tomorrow and he said no that they were fine to make the drive and drop. Exactly an hour later as I was heading outside to wait for them Bulk-man, John, called and said that they were out front. I raced outside, letting Mikes dad know they were delivering on the way, and asked if they could back up the driveway. It took them awhile because the driveway is on a bit of a steep incline but they were able to get pretty close to the backyard and then they lifted the bed and dumped 3 cubic yards of "black gold." At first it didn't look like much and I was thinking, OMG maybe we should have had them deliver the full 4 we paid for and not just 3, but once they were done I was like NEVERMIND this is way more than enough! When they'd pulled the truck out of the drive John stopped to chat with me as I handed him the check and thanked him for the delivery.
I told him about looking for compost for my small garden and finding nothing. Then going to craigslist two months later and letting Mikes Dad in on there service and how much he'd saved by using them compared to Home Depot. Finally, I asked him if I should mix Perlite into the compost to make it a little lighter and assure that there are no draining issues. His reply was, You can if you want to. A lot of people claim that compost has drainage issues but it doesn't especially if your using raised beds. You can add it but it would really just be an extra not a necessity. My uncle has won awards for growing crops in Connecticut that weren't supposed to be able to grow there and he grows in this compost 100% without any amendments. That was all I needed to hear. I'd read that the best gardens came from 100% compost but that it was even better to amend with some Perlite and even some Vermiculite. I also read that 100% compost was "black gold" that you couldn't get a better garden and that adding Perlite was a waste of money and time (mixing it in). From everything else I'd read I knew that growing in 100% compost was the best but hearing it from someone that KNOWS compost and knows great gardeners solidified what I'd already gathered but doubted. I am extremely happy with the service we received and when our veggies grow I'll let you know if we'll use them again but from the looks of things I think we will. Especially since he ended up being even cheaper than I'd calculated. The compost was $100 and it was $2.50/mile after 20 miles, one way. I'd calculated an extra 10 miles and the total was $112 but because we paid with check $6 was added making the total $118.00 rather than the $125 I'd expected if not a little more. Really great nice guy and there product is rich, black, they don't use lime, or other accelerators.
THANKS BULK MAN!!!
Location:
Madison Manor Falls Church
Subscribe to:
Posts (Atom)